In the construction field, knowing ‘how to remove concrete anchors‘ is essential. In this guide, we’ll break down the various types of concrete anchors, list out the tools you’ll need for the job, and provide straightforward steps for each anchor type. Plus, we’ll offer some handy tips to ensure a smooth removal process.
Table of Contents
What are the types of concrete anchors?
In structural engineering and construction, selecting the appropriate concrete anchor is essential for ensuring load-bearing capacity and structural integrity. Concrete anchors, categorized into ‘Male’ and ‘Female’ types, determine how fixtures are held steadfast in concrete settings.
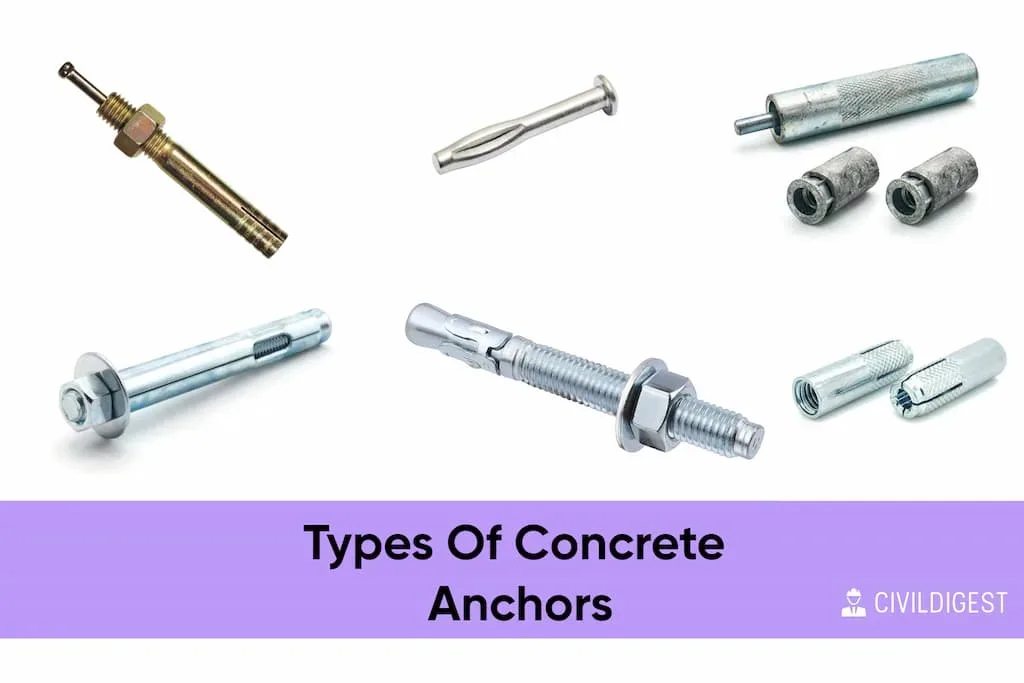
1. Male Type Anchors
Stud-type anchors that are directly inserted into pre-drilled holes in the concrete.
- Wedge Anchors
- Sleeve Anchors
- Split Drive Concrete Anchor
- Strike Anchor
General Features:
- Inserted directly into a predrilled hole in the concrete.
- The hole size is typically equal to the anchor size.
- No need to spot the hole beforehand.
- Allows for drilling through the fixture straight into the base material.
- Doesn’t require setting tools.
2. Female Type Anchors
These are specially crafted for bolts to fit into.
- Drop-In Concrete Anchor
- Machine Screw Anchor
- Lag Shield Anchor
General Features:
- Tailored for a bolt or screw insertion.
- Positioned within a hole in the concrete.
- The bolt or screw then goes through the fixture and into the anchor.
- Spotting of the hole is typically needed.
- A setting tool is often required.
Choosing the right anchor is pivotal for the safety and longevity of structural installations. Proper selection ensures seamless construction processes and robust end results.
Tools Required for Removing Concrete Anchors
| Concrete Anchor Type | Tools Required |
| Wedge Anchors | Hacksaw or grinding wheel |
| Hammer | |
| Concrete patching compound | |
| Trowel | |
| Sleeve Anchors | Wrench or drill attachment |
| Hammer | |
| Hacksaw or cut-off wheel | |
| Split Drive Concrete Anchor | Hammer and chisel |
| Pliers or wrench | |
| Flat pry bar (if needed) | |
| Grinder or saw (for stubborn cases) | |
| Punch tool | |
| Strike Anchor | Wrench or drill attachment |
| Hammer | |
| Hacksaw or cut-off wheel | |
| Punch tool | |
| Carbide bit for drilling (preparation) | |
| Drop-In Concrete Anchor | Wrench or screwdriver |
| Drill with a suitable bit | |
| Pliers or a claw hammer | |
| WD-40 (for rusted/tight screws) | |
| Machine Screw Anchor | Wrench or suitable drill attachment |
| Pliers or wrench | |
| Flat pry bar (if necessary) | |
| Hammer | |
| Lag Shield Anchor | Wrench or suitable drill attachment |
| Pliers or wrench | |
| Flat pry bar (if needed) | |
| Hammer |
Wedge Anchors
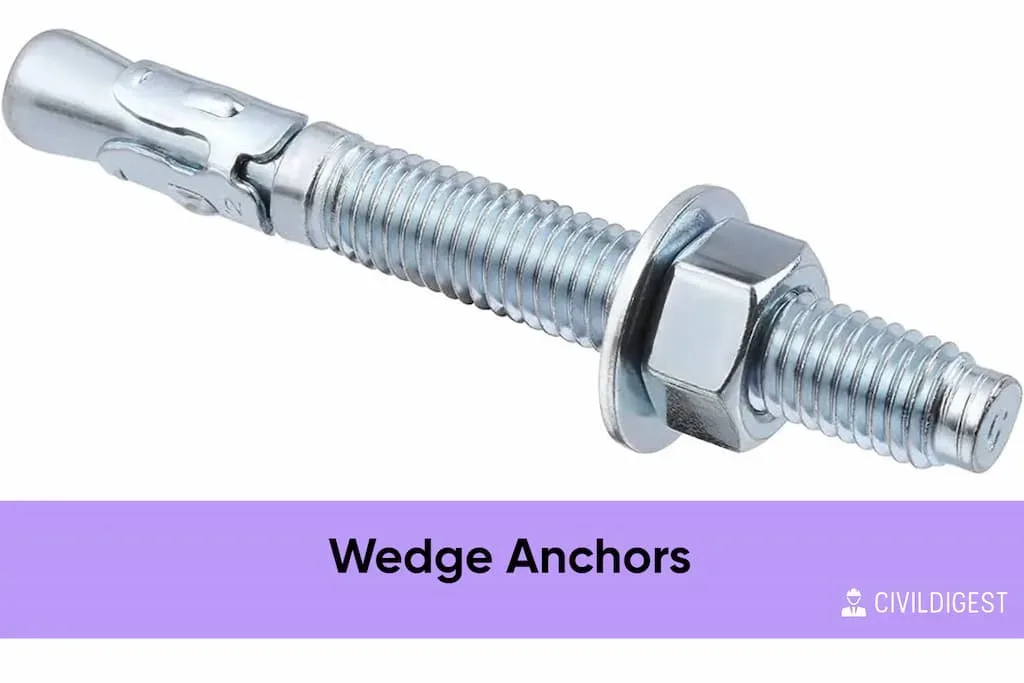
Wedge anchors are favored for their corrosion resistance, simplicity in insertion, and robust strength. Especially for heavy load or shear tasks, wedge anchors serve reliably. Notably, in regions with seismic activity, the seismic-grade wedge anchors offer enhanced safety and stability.
- Made of a stud with two joined pieces.
- One end is threaded.
- The other features an expanding mechanism, inclusive of a clip and wedges.
- Purpose-built for solid concrete applications.
- Not suitable for brick, block, mortar, or stone.
- Comprises four primary components:
- Threaded anchor body.
- Expansion clip.
- Nut.
- Washer.
The drilled hole for a wedge anchor should align with its diameter size.
Step-by-step Guide to Removing Wedge Anchors
Cutting the Anchor:
- Use a hacksaw or grinding wheel.
- Sever the threaded, above-ground section of the anchor.
Flatten the Surface:
- If any nub remains, ensure it’s flush with the surrounding concrete.
- This can be achieved using a hammer.
Pushing the Anchor Down:
- Employ a hammer and punch.
- Drive the anchor into the concrete until submerged below the surface.
Patching the Hole:
- Fill the void with concrete patching compound.
- Smooth the compound using a trowel, ensuring a seamless finish.
Sleeve Anchors
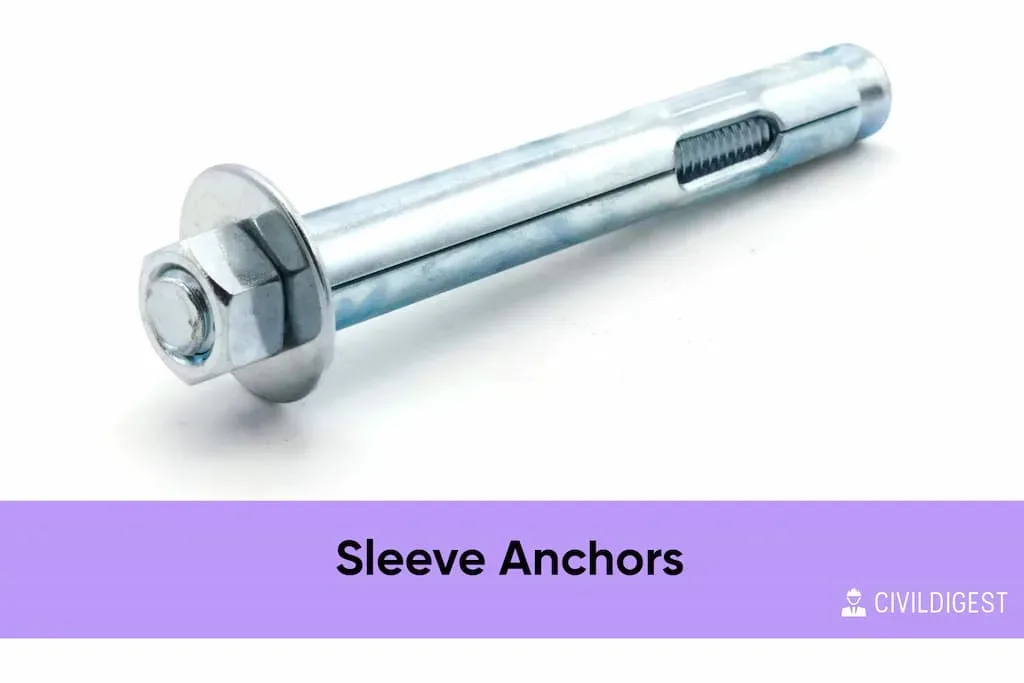
Sleeve anchors, a staple in construction and structural engineering, are employed for fastening materials securely to concrete, brick, or masonry surfaces. Here’s an overview based on practical construction applications:
- Designed for anchoring objects to solid surfaces.
- Requires pre-drilled holes for insertion.
- The hole depth should exceed the fixing depth by 1/2″ to 1″.
- Once inserted, they can be expanded for a snug fit.
- Recognized as the predominant male expansion anchor for brick walls.
- Offers consistent and reliable holding values.
Step-by-step Guide to Removing Sleeve Anchors
When it comes to removing sleeve anchors, following a systematic approach ensures minimal damage to the base material and safe extraction.
Detach the Anchor Head:
- Using a wrench or drill attachment, unscrew the nut and washer.
- Remove the anchor head from its threaded section.
Submerge the Anchor:
- Gently tap the remaining anchor part into the base material using a hammer.
- Ensure it’s driven as deep as possible without causing undue damage.
Saw Off Protrusions:
- If any part of the anchor still protrudes, utilize a hacksaw for a clean cut.
Alternate Approach:
- In cases where the anchor can’t be driven deeper, it’s viable to sever the stud using a hacksaw or cut-off wheel.
Split Drive Concrete Anchor
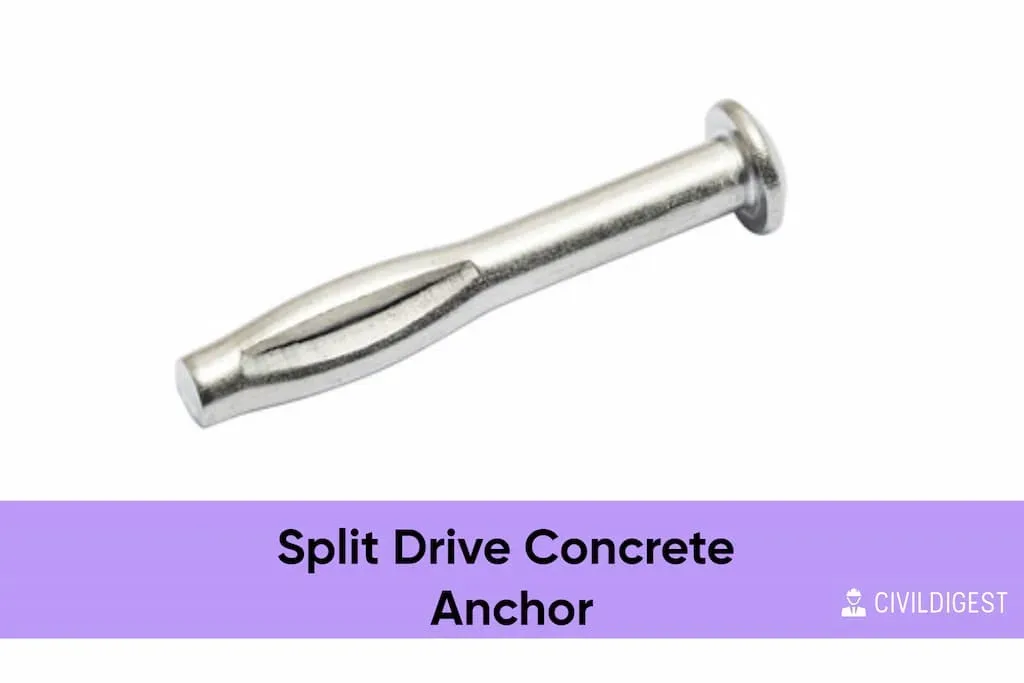
Split Drive Concrete Anchors, often encountered in construction and structural engineering projects, have specific characteristics grounded in practical applications:
- They are one-piece expansion anchors.
- Suitable for use in concrete, grout-filled blocks, and stone.
- The working end of the anchor compresses and expands as it’s driven in, exerting force against the hole’s walls.
Step-by-step Guide to Removing Split Drive Concrete Anchor
Here’s a stepwise method:
Break the Surrounding Concrete:
- Utilize a hammer and chisel.
- Aim to break around the anchor, ensuring minimal damage to the surrounding material.
Loosen the Anchor:
- Grasp the anchor using pliers or a wrench.
- Employ a twisting motion back and forth to gradually loosen it.
Employ a Pry Bar if Necessary:
- If the anchor remains stuck, resort to a flat pry bar.
- Use the hammer to apply force, attempting to extract the anchor.
Cut the Anchor Head:
- In stubborn cases, a grinder or saw becomes essential.
- The goal is to remove the anchor’s head.
Drive the Remaining Anchor:
- Once the head is off, use a punch tool combined with a hammer.
- Push the anchor’s residual part further into the hole.
Strike Anchor
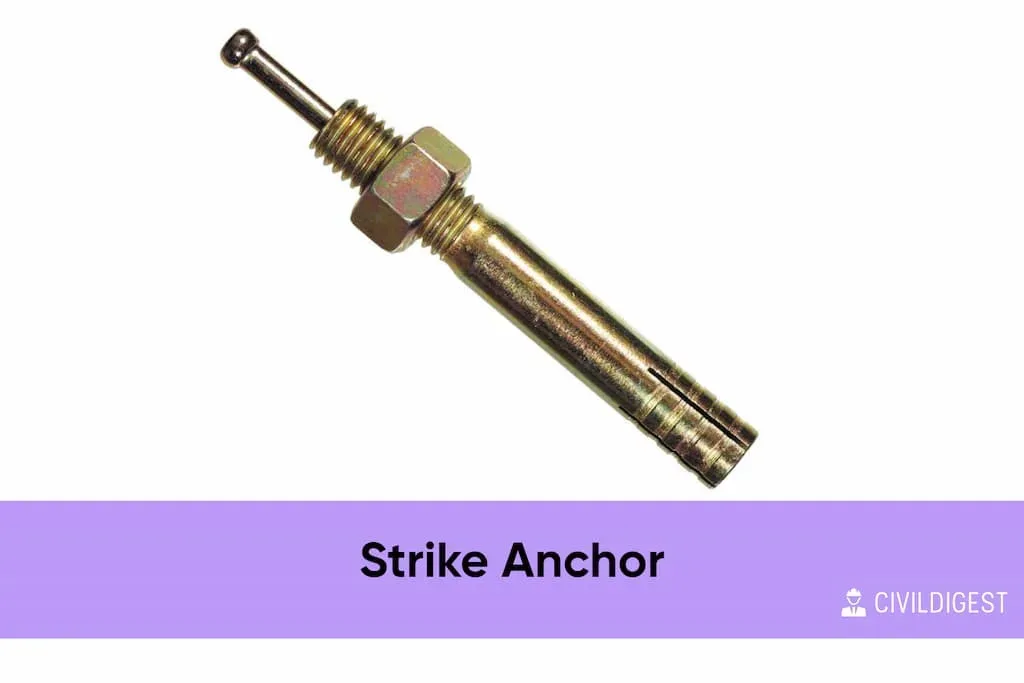
Strike anchors possess certain features:
- Exclusively designed for concrete fastening; not suitable for other masonry materials.
- Comprises a carbon steel body and a hardened carbon steel drive pin.
- Installation involves hammering the pin down the anchor’s center.
- They are male anchors.
- Best employed for medium to heavy-duty anchoring tasks.
Step-by-step Guide to Removing Strike Anchor
Here’s a precise procedure:
Dismantle the Anchor:
- Use a wrench or drill attachment.
- Detach the nut and washer.
Push Anchor into Concrete:
- Check the hole depth beneath the anchor.
- Use a hammer to drive the anchor into the concrete.
Cut Protruding Anchor Section:
- If the anchor remains above the surface, use a hacksaw.
- Alternatively, a cutoff wheel can assist in removing the protruding part.
Finalize the Anchor Removal:
- After removing the anchor’s head, employ a punch tool.
- Use a hammer to drive any residual anchor into the hole.
For optimal results when preparing a hole for a strike anchor, use a carbide bit for drilling. Ensure the hole matches the anchor diameter and surpasses the penetration depth by a minimum of 1/4 inch.
Drop-In Concrete Anchor
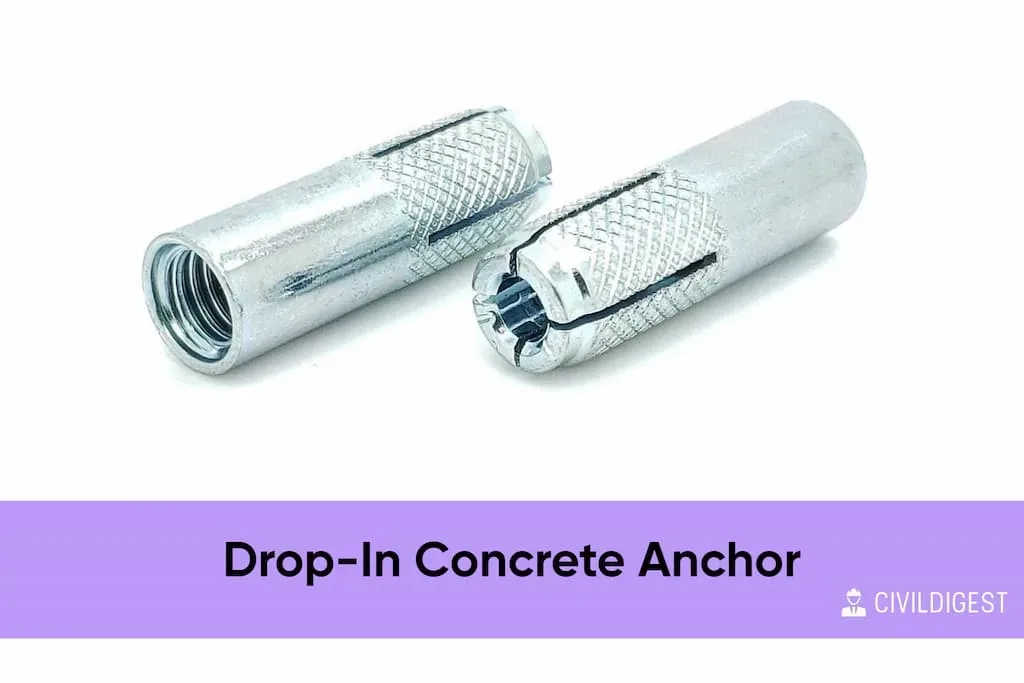
Features of Drop-In concrete anchors:
- These are female anchors, explicitly designed for anchoring into concrete.
- Installation involves dropping the anchor into a pre-drilled hole.
- A setting tool is used, which expands the anchor, ensuring a secure fit within the concrete hole.
- They are exclusive to solid concrete; not suitable for other masonry materials.
- Primarily utilized to suspend various fixtures like electrical cable trays, HVAC ductwork, fire sprinkler pipes, and heads.
- Ideal for applications requiring flush-mounted anchors, and where bolts need frequent insertion and removal.
Step-by-step Guide to Removing Drop-In Concrete Anchor
Ensuring the correct removal of Drop-In anchors from concrete structures is essential. Here’s a concise guide:
Detach Connected Items:
- Unbolt or unscrew the anchor.
- Use WD-40 to loosen rusted or tight screws.
Drill Through the Anchor:
- Start with a drill bit matching the anchor’s face size.
- Drilling induced vibrations, breaking the anchor’s thread, making it easier to extract.
Insert a Screw/Bolt into the Anchor Hole:
- Ensure the screw/bolt matches the anchor thread.
- Insert a minimum of 1/2 inch of the bolt into the anchor.
Extraction of the Anchor:
- Utilize pliers or a claw hammer based on the screw/bolt size.
- Grip the bolt firmly and pull upwards. With slight pressure, the anchor should come out smoothly.
Machine Screw Anchor
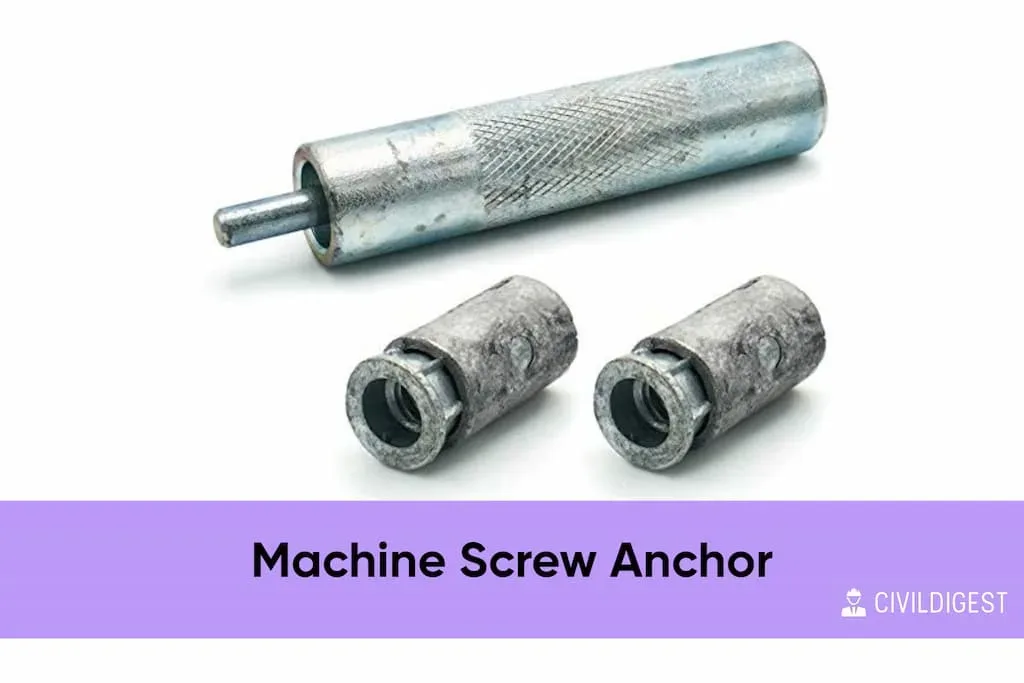
- They are female-type anchors, tailored for anchoring into materials like concrete, brick, or block.
- Machine Screw Anchors come with internal machine screw threads, enhancing their holding capacity.
- A distinct feature is their requirement for a setting tool for installation.
- Always ensure having a setting tool during installation; it’s pivotal for secure anchoring.
- Their primary function revolves around affixing fixtures and other objects to masonry substrates.
Step-by-step Guide to Removing Machine Screw Anchor
Unscrew the Machine Screw:
- Employ a wrench or a suitable drill attachment.
- Turn counter-clockwise to remove the screw.
Loosen the Anchor:
- With pliers or a wrench, grip the anchor’s body.
- Twist back and forth until it starts to free up from the masonry.
Prying out the Stuck Anchor:
- In case the anchor doesn’t loosen, resort to a flat pry bar.
- Use it in conjunction with a hammer, gently nudging the anchor out from its hole.
Lag Shield Anchor

Lag Shield Anchor are:
- Primarily designed for anchoring into materials like concrete, brick, and block.
- The mechanism involves Lag Screws, which expand the anchor against the substrate for a secure hold.
- Classified as female-type anchors, they provide internal threading.
- Their chief purpose is to fix fixtures and varied objects to masonry substrates.
- The installation of these anchors necessitates a hammer drill and an aptly sized carbide drill bit.
Step-by-step Guide to Removing Lag Shield Anchor
Detach the Lag Screw:
- Use a wrench or a fitting drill attachment.
- Turn counter-clockwise to release the screw.
Loosening the Anchor:
- Grab the anchor using pliers or a wrench.
- Initiate a back-and-forth twisting motion until it starts to disengage from the masonry.
Extraction of the Persistent Anchor:
- If the anchor remains embedded, employ a flat pry bar.
- Pair it with a hammer, methodically extracting the anchor from its hole.
Related: How to Remove Tire Marks from Concrete
Tips for Successful Removal
- Prioritize Safety: Always use safety gear like gloves and goggles.
- Choose the Right Tools: Match the tool to the specific anchor type.
- Clean Before Starting: Clear the area around the anchor.
- Loosen Anchors First: Attempt to unscrew or loosen anchors before removal.
- Patience with Stubborn Anchors: Use lubricants like WD-40 if needed.
- Avoid Overexertion: Excessive force can damage the concrete.
- Patch After Removal: Fill holes with a concrete patching compound.
- Know Your Anchor: Familiarize yourself with the anchor type before removal.
- Consult When Unsure: Seek expert advice if uncertain about removal.
Related: How to Get Spray Paint Off Concrete
Conclusion
Understanding how to remove concrete anchors is vital. With the right tools and expert guidance, the removal process becomes simplified. Whether you’re dealing with wedge anchors, sleeve anchors, or other types, being informed is your first step to successful DIY or professional construction projects.